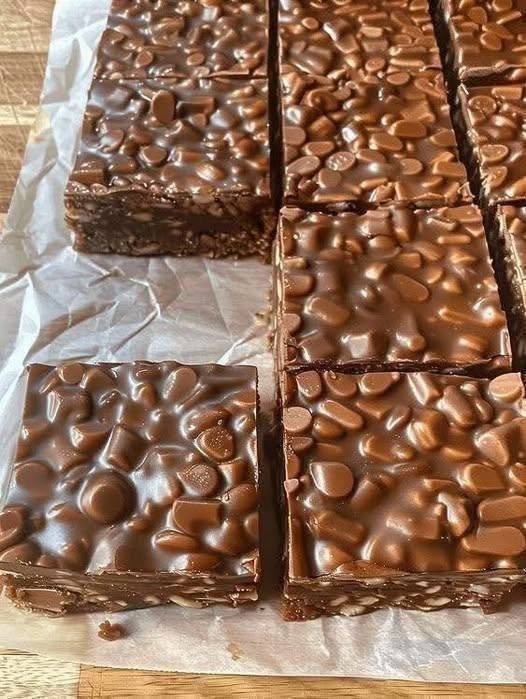
Homemade No-Bake Chocolate Peanut Butter Crunch Bars
These chocolate peanut butter crunch bars are rich, crispy, chewy, and incredibly easy to make. They require no oven, use simple pantry ingredients, and have three delicious layers: a crunchy peanut-butter cereal base, a creamy chocolate topping, and plenty of roasted peanuts for extra texture.
Ingredients
For the crunchy peanut butter base
- 2 cups crispy rice cereal
- ½ cup roasted peanuts, roughly chopped
- 1 cup creamy peanut butter
- ½ cup honey or maple syrup
- ¼ cup unsalted butter or coconut oil
- 1 teaspoon vanilla extract
- ¼ teaspoon salt
For the chocolate topping
- 1 cup semi-sweet or milk chocolate chips
- 2 tablespoons creamy peanut butter
- 1 tablespoon coconut oil or unsalted butter
Optional toppings
- 2 tablespoons chopped roasted peanuts
- A small pinch of flaky sea salt
- 2 tablespoons mini chocolate chips
- A drizzle of melted peanut butter
Equipment
- 8×8-inch (20×20 cm) square baking pan
- Parchment paper
- Medium saucepan
- Mixing bowl
- Rubber spatula
- Microwave-safe bowl, if melting the chocolate in the microwave
Instructions
1. Prepare the pan
Line an 8×8-inch square baking pan with parchment paper, leaving some paper hanging over two sides. This will make it much easier to lift the finished bars out of the pan.
For especially easy removal, you can lightly grease the pan before adding the parchment.
2. Prepare the crunchy ingredients
Add the crispy rice cereal and chopped roasted peanuts to a large mixing bowl.
Give them a gentle stir so the peanuts are distributed throughout the cereal.
If you want an especially nutty flavor, you can lightly toast the peanuts in a dry skillet over medium-low heat for 2–3 minutes. Let them cool before adding them to the cereal.
3. Make the peanut butter mixture
Place the peanut butter, honey or maple syrup, and butter or coconut oil in a saucepan.
Heat over low heat, stirring constantly.
You don’t want the mixture to boil. Simply heat it until the peanut butter and butter have melted and everything becomes smooth and glossy.
Remove the saucepan from the heat.
Stir in the vanilla extract and salt.
4. Combine everything
Pour the warm peanut butter mixture over the crispy rice cereal and peanuts.
Using a rubber spatula, gently fold everything together.
Keep mixing until all of the cereal is coated with the peanut butter mixture.
Try not to crush the cereal too much—you want to keep as much of that crunchy texture as possible.
5. Press the mixture into the pan
Transfer the mixture to your prepared baking pan.
Spread it evenly with a spatula.
Now comes an important step: press the mixture down firmly.
You can place a piece of parchment paper over the surface and press down with your hands or the bottom of a glass.
The more firmly you compact the mixture, the easier the bars will be to cut and eat without falling apart.
6. Make the chocolate topping
Place the chocolate chips, peanut butter, and coconut oil or butter in a microwave-safe bowl.
Microwave for about 20–30 seconds at a time, stirring well between each interval.
Continue until the chocolate is almost completely melted. Stir until completely smooth.
Alternatively, melt the ingredients gently in a heatproof bowl over a saucepan of barely simmering water.
Be careful not to let water get into the chocolate.
7. Add the chocolate layer
Pour the melted chocolate over the peanut butter crunch base.
Use a spatula to spread it into a smooth, even layer.
While the chocolate is still melted, sprinkle the top with chopped roasted peanuts and, if you like, a tiny pinch of flaky sea salt.
The combination of sweet chocolate, salty peanuts, and creamy peanut butter is especially good.
8. Chill
Place the pan in the refrigerator for 1–2 hours, or until the chocolate is completely firm and the base feels set.
If you’re in a hurry, you can put the pan in the freezer for about 30–45 minutes.
Don’t leave it in the freezer for too long, though, because the bars can become extremely hard and difficult to cut.
9. Cut into bars
Once firm, lift the entire slab out of the pan using the parchment paper.
Place it on a cutting board.
For neat cuts, use a large sharp knife. If the chocolate feels very hard, let the bars sit at room temperature for 5–10 minutes before slicing.
Cut into 12–16 bars or squares, depending on the size you prefer.
Storage
Store the bars in an airtight container.
- Refrigerator: up to 1 week
- Freezer: up to 2 months
If freezing, place parchment paper between the layers so they don’t stick together.
Let frozen bars sit at room temperature for several minutes before eating.
Helpful Tips
Make them extra crunchy
Use roasted peanuts and crispy rice cereal that are very fresh. You can also add ½ cup of crushed pretzels for an extra salty crunch.
Make them softer
For softer, chewier bars, slightly increase the honey or maple syrup to about ⅔ cup.
Make them less sweet
Use unsweetened peanut butter and dark chocolate instead of milk chocolate.
Make them more chocolatey
Add ½ cup mini chocolate chips to the cereal mixture after the warm peanut butter mixture has cooled slightly. Don’t add them while it’s piping hot or they’ll melt.
Use crunchy peanut butter
If you love texture, replace the creamy peanut butter with crunchy peanut butter. You’ll get little pieces of peanuts throughout the bars.
Add a peanut butter drizzle
Warm 2 tablespoons of peanut butter until pourable and drizzle it over the chocolate layer. Drag a toothpick through the drizzle to create a pretty swirled pattern.
Easy Variations
Chocolate Peanut Butter Pretzel Bars:
Replace ½ cup of the cereal with crushed pretzels and sprinkle extra pretzel pieces on top.
Triple Chocolate Bars:
Use chocolate cereal instead of regular crispy rice cereal and finish with melted milk chocolate and dark chocolate drizzle.
Rocky Road Style:
Add mini marshmallows and chopped peanuts to the base, then cover with chocolate.
Dark Chocolate & Sea Salt:
Use dark chocolate for the topping and finish with flaky sea salt. This gives the bars a richer, less-sweet flavor.
Why This Recipe Works
The honey or maple syrup helps bind the crispy cereal and peanuts together, while peanut butter provides richness and flavor. The chocolate topping sets into a firm shell in the refrigerator, giving you that satisfying crackly chocolate + crunchy peanut butter combination.
The result is a simple homemade treat that’s somewhere between a crispy rice bar, peanut butter candy, and chocolate crunch bar—without turning on the oven.
