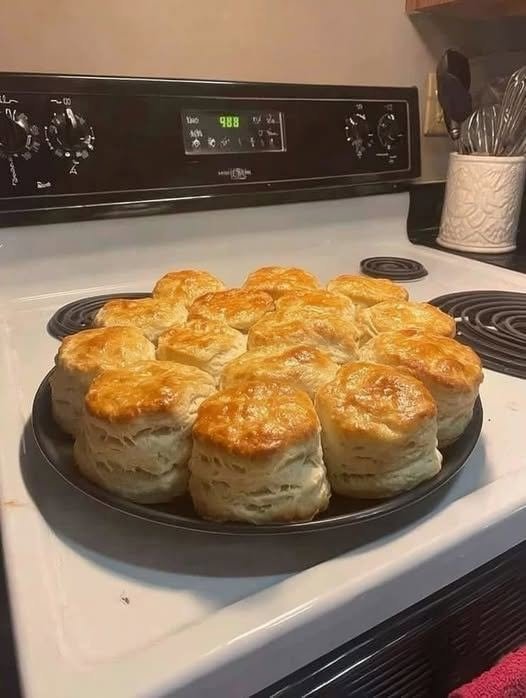
Homemade Gluten-Free Buttermilk Biscuits
These homemade gluten-free buttermilk biscuits are flaky, buttery, tender, and golden on the outside. They’re perfect with butter and honey, sausage gravy, eggs, or alongside a hearty dinner.
Makes: 8–10 biscuits
Prep time: 15 minutes
Chill time: 15 minutes
Bake time: 15–18 minutes
Total time: About 50 minutes
Ingredients
- 2 cups (240 g) gluten-free all-purpose flour blend
- 1 tablespoon baking powder
- ½ teaspoon baking soda
- 1 teaspoon salt
- 1 tablespoon granulated sugar
- ½ teaspoon xanthan gum, only if your flour blend doesn’t already contain it
- ½ cup (115 g) cold unsalted butter
- ¾–1 cup (180–240 ml) cold buttermilk
- 1 large egg, optional, for a richer biscuit
- 1 tablespoon melted butter, for brushing the tops
Instructions
1. Prepare the oven
Preheat your oven to 425°F (220°C).
Line a baking sheet with parchment paper.
For taller biscuits, you can also bake them close together in a lightly greased cast-iron skillet or baking dish.
2. Mix the dry ingredients
In a large bowl, whisk together:
- Gluten-free flour
- Baking powder
- Baking soda
- Salt
- Sugar
- Xanthan gum, if needed
Mix thoroughly so the leavening ingredients are evenly distributed.
3. Cut in the cold butter
Cut the cold butter into small cubes.
Add it to the flour mixture.
Using a pastry cutter, two forks, or your fingertips, work the butter into the flour until you have a mixture with pea-sized pieces of butter throughout.
Don’t completely blend the butter into the flour.
Those little pieces of cold butter create flaky layers as the biscuits bake.
4. Add the buttermilk
Start by adding ¾ cup of cold buttermilk.
Stir gently with a wooden spoon or spatula.
If the dough still looks dry or crumbly, add additional buttermilk 1 tablespoon at a time.
You want a soft, slightly sticky dough that holds together.
If using the egg, whisk it into the buttermilk before adding the mixture to the flour.
Don’t overmix.
Gluten-free biscuit dough doesn’t need kneading.
5. Chill the dough
Place the bowl in the refrigerator for about 15 minutes.
Keeping the dough cold helps the butter remain solid and produces a better rise.
6. Shape the biscuits
Lightly flour a piece of parchment paper with gluten-free flour.
Turn the dough onto the surface.
Because gluten-free dough is more delicate, don’t knead it like traditional wheat biscuit dough.
Instead, gently pat it into a rectangle about ¾–1 inch (2–2.5 cm) thick.
Fold the dough in half, gently press it down, and repeat this process 2–3 times.
This creates layers without requiring traditional kneading.
7. Cut the biscuits
Use a 2½–3-inch round biscuit cutter to cut the dough.
Press the cutter straight down rather than twisting it.
A twisting motion can seal the edges and prevent the biscuits from rising properly.
Place the biscuits on the prepared baking sheet.
For softer sides, arrange them so they’re touching each other.
For crispier edges, leave about 1–2 inches between each biscuit.
8. Brush with butter
Brush the tops lightly with melted butter.
For an extra-golden top, you can brush them with a little buttermilk or egg wash instead.
9. Bake
Bake for 15–18 minutes, or until the biscuits are puffed and golden brown.
The tops should be lightly browned and the centers should feel set.
If needed, bake for another 2–3 minutes.
10. Finish and serve
Remove the biscuits from the oven and immediately brush the tops with a little more melted butter.
Let them cool for about 5 minutes before serving.
They’re especially delicious while warm.
Tips for Flaky Gluten-Free Biscuits
Keep everything cold
Cold butter is one of the biggest secrets to flaky biscuits.
If your kitchen is warm or the dough becomes soft, refrigerate it for another 10–15 minutes before baking.
Don’t overwork the dough
Gluten-free dough doesn’t need to be kneaded. Handle it gently and just enough to bring everything together.
Don’t add too much flour
The dough should be slightly sticky. Adding lots of extra flour can make the biscuits dry and crumbly.
Use a sharp biscuit cutter
Press straight down without twisting.
This helps the biscuits rise higher.
Bake immediately
Once the biscuits are shaped, get them into the hot oven. The cold butter and strong initial heat help create a better rise.
Homemade Buttermilk Substitute
If you don’t have buttermilk, combine:
- 1 cup milk
- 1 tablespoon lemon juice or white vinegar
Stir and let it stand for 5–10 minutes before using.
For this recipe, you’ll only need about ¾–1 cup.
Cheesy Gluten-Free Biscuits
For savory cheese biscuits, add:
- 1 cup shredded cheddar cheese
- ½ teaspoon garlic powder
- ½ teaspoon dried parsley
Fold the cheese into the dough just before adding the buttermilk.
Brush the hot biscuits with melted butter mixed with a little garlic powder for a delicious garlic-cheese finish.
Sweet Biscuits
For breakfast biscuits, increase the sugar to 3 tablespoons and add:
- ½ teaspoon cinnamon
- 1 teaspoon vanilla
Serve warm with butter, honey, jam, or fresh berries.
Storage
Store cooled biscuits in an airtight container at room temperature for 1–2 days.
For longer storage, refrigerate them for up to 4–5 days.
To freeze, wrap individual biscuits and place them in a freezer-safe bag for up to 3 months.
Reheat at 350°F (175°C) for about 8–10 minutes, or until warmed through.
For the best gluten-free texture, use a flour blend specifically designed for baking and check that it is certified gluten-free if you’re cooking for someone with celiac disease.
